Spring took a long time coming this year, but we are finally into the “growing season” and the weather is warming up into more seasonal summer temperatures. So this is the time to make sure all your seeds and plants are “ready-set-(to) grow.”
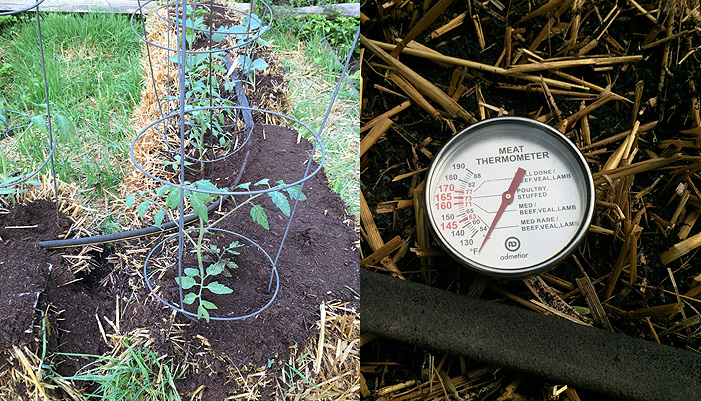
For the record, I started conditioning the straw bales on May 21. The straw bales were really “cooking” at almost 130 degrees by the beginning of June, just 12 days after my first application of organic blood meal. “Conditioning” involved watering the straw bales every day and feeding the bales blood meal every other day for the first six days. On Days 7, 8 and 9, they were fed a lesser amount of blood meal every day. Finally, on Day 10, the straw bales were fed a full N-P-K fertilizer (the letters stand for the ratio between Nitrogen, Phosphorus, and Potassium). I used an organic Fish Emulsion. (Note: you do need neighbors who also value fresh vegetables, as the bales have their own distinctive odor by this time—but worry not, it doesn’t last long!) There is a difference between the amount of organic or non-organic fertilizer you can use. These are described fully in Joel Karsten’s Straw Bale Gardening book.
While I was waiting for the bales to cool, I started making my own very inexpensive seed tape using paper towels, flour paste, and a paint brush. I positioned the seeds diagonally across the paper towels in a dab of flour paste, to hold them in place. I stacked the seed packets of carrots, romaine lettuce, spinach, beans, cukes, pumpkins, and kale on the kitchen counter until the bales “cooled down” a little.
By June 11, the bales were very “toasty” to touch but not too hot to start planting. The tomato, pepper and broccoli plants were planted directly into the straw bales, tucking them firmly into place with organic soil to protect their roots. On June 12, I covered all the remainder of the bales with a thin layer of organic soil, packing it firmly into place. Then I arranged each of the paper towel “seed” tapes on top of the bales and added another layer of organic soil on top, “Oreo cookie style” (layer of organic soil, seeds, layer of organic soil).
I am now watering the seed areas with warm water every morning before putting the soaker hose on the bales.
I know this is a late start for pumpkins, but I am hopeful the greenhouse effect from the straw bales will speed up the growing season. (I plan to compare the seed packet growing times to actual results to see if the straw bales method meets or exceeds the seed packets maturity dates.) Right now, the straw bales look rather bare, so I will also be looking to plant herbs and flowers on the sides of the bales to add a bit of straw bale curb appeal. Stayed tuned for more pics . . .
For more info and tips, visit Joel Karsten’s Straw Bale Gardening website.