 Have you ever heard of straw bale gardening?
I happened upon it last spring when a neighbor built a beautiful (and quite time-consuming) raised vegetable bed. My back agreed with me that a raised vegetable garden would be a wonderful idea! My husband did not, and so began my search for a raised garden bed. There are plenty of pre-made garden beds for sale, but I found the prices and sizes too limiting for my budget. Luckily, I found a website, Straw Bale Gardening, where Joel Karsten answers the question, “What is Straw Bale Gardening?”
From a holistic point of view, straw bale gardening offers both primary and secondary food advantages. For those of you who are new to this perspective, primary foods feed your “sense of wellbeing.” It is easier to visualize them in a circular pie chart, with each primary food making up a slice of the pie. SBG positively affects your lifestyle by promoting exercise (and fresh air as a side benefit), home cooking, a sense of joy and financial savings.
From a secondary food advantage (these are the foods we eat), straw bale gardening allows you to eat real, local (and very fresh) foods and gives you the choice of whether you want to grow organic. I suggest if you grow organic that you also use organic soil and fertilizer.
There are some very specific steps and logistics to straw bale gardening, but before I get into them, I wanted to share why I considered straw bale gardening in the first place:
- First, the price was right at $15 a bale.
- Second, it was a ready-made raised garden bed.
- Third, no tilling or weeding is required. Awesome!
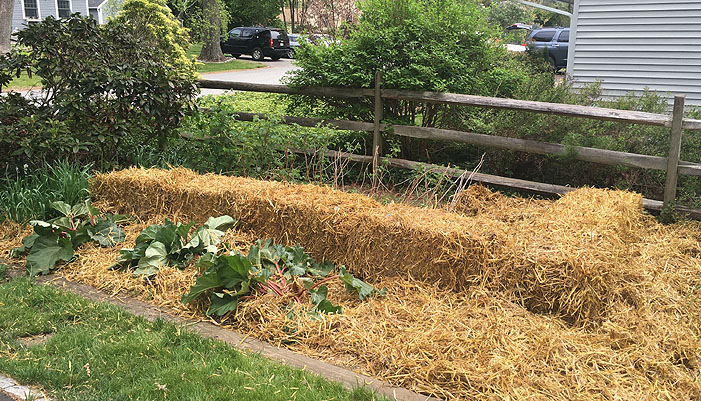
- Fourth, I could place my straw bales anywhere I had sun. On dirt, a driveway, even a lawn. I placed mine in a current vegetable garden.
- Fifth, it creates its own greenhouse as it decomposes, speeding up growing time.
- Lastly, you cannot overwater the straw bales, as the water drains out onto the ground.
Now for those useful tips from Straw Bale Gardening—here they are:
- First, make sure you purchase straw, not hay. Straw’s center is hollow and holds water.
- Second, position the straw cut side up, so it can absorb the water and fertilizer.
- Third, water the bales every day. I used a soaker hose set-up across the top of the bales. I may consider purchasing a timer this year, as the best time to water is early morning.
- Fourth, it takes about 10 to 12 days to prepare the bales for seedlings or seeds. I suggest purchasing Joel’s book Straw Bale Gardens. It’s easy to follow, has beautiful photos, and other useful information (or check out his website).
- Fifth, if planting seeds, be sure to check the temperature of the straw bale first, as it gets very hot when first decomposing. Seedlings can go right in with a little soil mix.
- Last, this is a learning experience. Start simple with your favorite veggies or herbs. You can even grow flowers out the side!
Please share your straw bale gardening experiences with me so others can learn from your successes and failures! Send pictures and comments to me at info@prioritizeyourhealth.com.